BBQ Pizza? Yes, Please!
- Details
- Category: 99+1 Days of Summer
- Published: Tuesday, 01 June 2021 03:00
 Most of us have made a home-made pizza at least once. Some of us in a regular oven, and some of us fancier pizza connoisseur's have even tried it in a wood-fired oven...but have you ever tried making pizza on the BARBECUE? Well, I tried it out, and it was *mind-blowing*. Think artisan pizza, x10 on the mouthwatering scale. It was a heap of cheesy, charry (in the best way possible), chewy deliciousness.
Read more to learn how to make a perfectly barbecued pizza for yourself for yourself!
Post a picture of your BBQ pizza and tag us @CHRIRadio on Facebook, Instagram, or Twitter!
INGREDIENTS:
- 1 ball of pizza dough (about 1 pound) - can be homemade or store-bought. I bought mine from Farm Boy and was very satisfied with how it grilled and tasted!
- 1/2 to 1 cup of tomato sauce - again, homemade or store-bought
- Cheese, such as torn mozzarella, grated Asiago or Swiss, and grated Parmesan
- Toppings such as herbs, thinly sliced vegetables, pepperoni and salami, prosciutto, chopped greens such as kale, or diced tomatoes
- Olive oil
EQUIPMENT:
- Grill, gas or charcoal
- Brush
- Metal tongs
- Metal spatula
INSTRUCTIONS
- Heat the grill: You should heat it quite hot; Aim for at least 550°F. If you have a choice on your grill between direct and indirect heat, set it up so the pizza is over direct heat.
- Gather your ingredients and toppings: Set up a table or bench near the grill so you have easy access to everything. When it's time to put the ingredients on, you've got to be fast, so be sure that everything is ready to go.
- Also have your tools close to hand: You will want a pair of long metal tongs to flip the pizza. I used a spatula as well, but it may not be necessary for you. You may also want a hot pad or oven mitt if your grill lid gets hot.
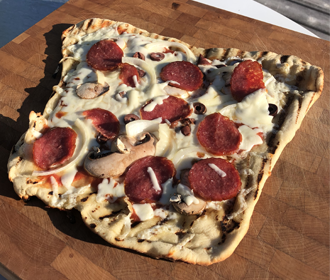
- Prep your dough: It should be stretched or rolled out into a thin circle. (Circle-ish — as you can see, my pizza turned out as an awkward square. Pizza is pizza, right?!)
- Brush the dough with olive oil: Brush one side of the dough with oil; this is the side you'll lay down on the grill. Be a bit generous with the oil - you don't want anything sticking!
- Grill one side of the pizza: Take the lid off the grill. Lay the dough flat on the grill with the olive-oil side down. Brush the top of the dough with a thin layer of olive oil, too. Let the dough cook for about 3 minutes, with the lid off, or 1 to 2 minutes with the lid on. Use the tongs to lift up the dough from time to time, checking on how it is doing. You want grill marks on it, but you don't want the dough to get crispy; it should be just set.
- Top the pizza: Flip the dough over with the tongs or spatula. The dough should come up easily and flip without tearing. Now is where your organization comes in! You need to top the pizza quickly. Spread on a thin layer of sauce, some cheese, and toppings. It shouldn't be too heavily loaded, or the pizza won't cook well.
- Cook the pizza: Put the lid on and cook for 3 to 5 minutes (in my case, the pizza was ready in about 60 seconds...so keep an eye on it). Use your sense of smell; if the pizza smells like it's scorching, take the lid off and move the pizza to a cooler part of the grill or turn the heat down.
- Remove the finished pizza: Remove the lid and check the pizza. The edges should be crisp and well-done, and the cheese should all be melted. Drag the pizza off with the spatula or tongs. Let cool for 3 minutes, then cut into pieces and eat!
RECIPE NOTES
- Every grill is different! You know your grill best. Your pizza may take longer or shorter depending on how hot the grill gets and where your areas of direct and indirect heat are. Consider your first pizza a sacrifice to learning just how to control your grill temperature.
- Cooking times will vary! On that same note, of course, you need to keep an eye on the heat. The timing will depend on how thin you stretch your dough, and how hot your grill gets. Flipping the dough gives you an extra measure of control and certainty, though, that the crust will be cooked through by the time your toppings have melted and warmed.
I followed this great recipe from thekitchn.com!